Visual Studio 2013 で [ファイル] – [新規作成] – [プロジェクト] を選択。
テンプレートの [Visual C++] 内に Windows for IoT とか言うのがあります。
プロジェクト名をつけて適当に作成。“arduino.h” がないよーと怒られました
。
どうも Galileo 用の SDK を NuGet で入れるらしい。
[ツール] – [NuGet パッケージ マネージャー] – [ソリューションの NuGet パッケージの管理]あたりから、”Galileo C++ SDK” をインストール。
これで準備は完了。
デバッグ対象はプロジェクトのプロパティから [構成プロパティ] – [デバッグ] で “リモート サーバー名” の箇所を Galileo のホスト名に変更するだけ。
F5 でデバッグ開始すると、資格情報の入力画面になるので、ログオンすれば OK。
あとは Visual Studio で普段のように開発出来るので、ガリガリやりましょう。
// Main.cpp : Defines the entry point for the console application.
//

#include "stdafx.h"
#include "arduino.h"

int _tmain(int argc, _TCHAR* argv[])
{
    return RunArduinoSketch();
}

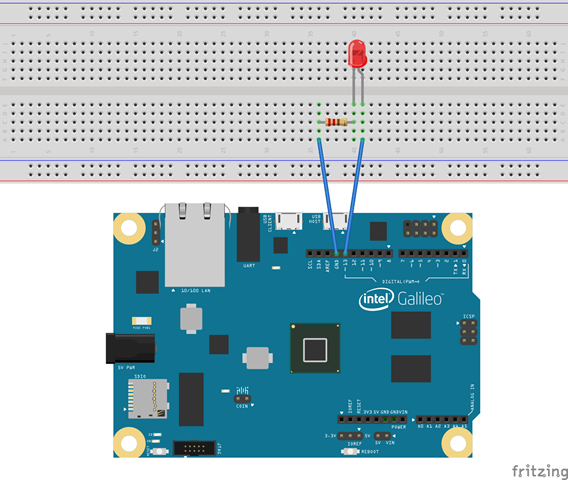
int led = 13;  // This is the pin the LED is attached to.

void setup()
{
    // TODO: Add your code here

    pinMode(led, OUTPUT);       // Configure the pin for OUTPUT so you can turn on the LED.
}

// the loop routine runs over and over again forever:
void loop()
{
    // TODO: Add your code here

    digitalWrite(led, LOW);    // turn the LED off by making the voltage LOW
    Log(L"LED OFFn");
    delay(1000);               // wait for a second
    digitalWrite(led, HIGH);   // turn the LED on by making the voltage HIGH
    Log(L"LED ONn");
    delay(1000);               // wait for a second
}


1 comment for “Windows for IoT on Intel Galileoで L チカ”