Windows 10 / Windows Server 2016 から、PowerShell Direct という機能が増えています。
これを活用すると、Hyper-V ホストから VM の中に対してファイルをコピーしたり、コマンド実行ができるので、大量の VM を自動で展開できるようになります。例えば、Azure PowerShell のバージョン毎に VM を作るには以下のような感じ。
事前に応答ファイルを差し込んだ sysprep 済みの VHD と、各バージョンの Azure PowerShell を用意しておく必要がありますが、その辺は説明が長くなるので今回は書きません。(わからない人は、応答ファイルとか unattend とか sysprep といったキーワードで検索すればいくらでも情報でるので調べてください。)
# Azure PowerShell のインストーラーを配置したフォルダー
$PowerShellInstallder = Get-ChildItem 'C:\Users\Administrator\Desktop\Azure PowerShell'

# Azure PowerShell のインストーラー分だけ VM を作成
$PowerShellInstallder | foreach{
    # ファイル名 (azure-powershell.1.0.0.msi) からバージョンを抽出
    $Ver = $_.Name -replace 'azure-powershell.', '' -replace '.msi', ''

    # 仮想マシン名の Prefix を定義
    $VMName = 'Win 10 Ent x64 with Azure PowerShell $Ver'

    # sysprep 済みのマスター イメージをコピー
    Copy-Item -Path 'D:\Win 10 Ent x64 with Azure PowerShell Master.vhdx' -Destination 'D:\Win 10 Ent x64 with Azure PowerShell $Ver.vhdx'

    # コピーした VHD をもとに VM を作成
    New-VM -Name $VMName -VHDPath 'D:\Win 10 Ent x64 with Azure PowerShell $Ver.vhdx'

    # VM のコア数、メモリ、NIC などを任意でカスタマイズ
    Set-VMProcessor -VMName $VMName -Count 16
    Set-VMMemory -VMName $VMName -DynamicMemoryEnabled $true
    Set-VMNetworkAdapter -VMName $VMName
    Get-VMNetworkAdapter -VMName $VMName | Connect-VMNetworkAdapter -SwitchName external

    # VM を起動
    Start-VM -Name $VMName
}
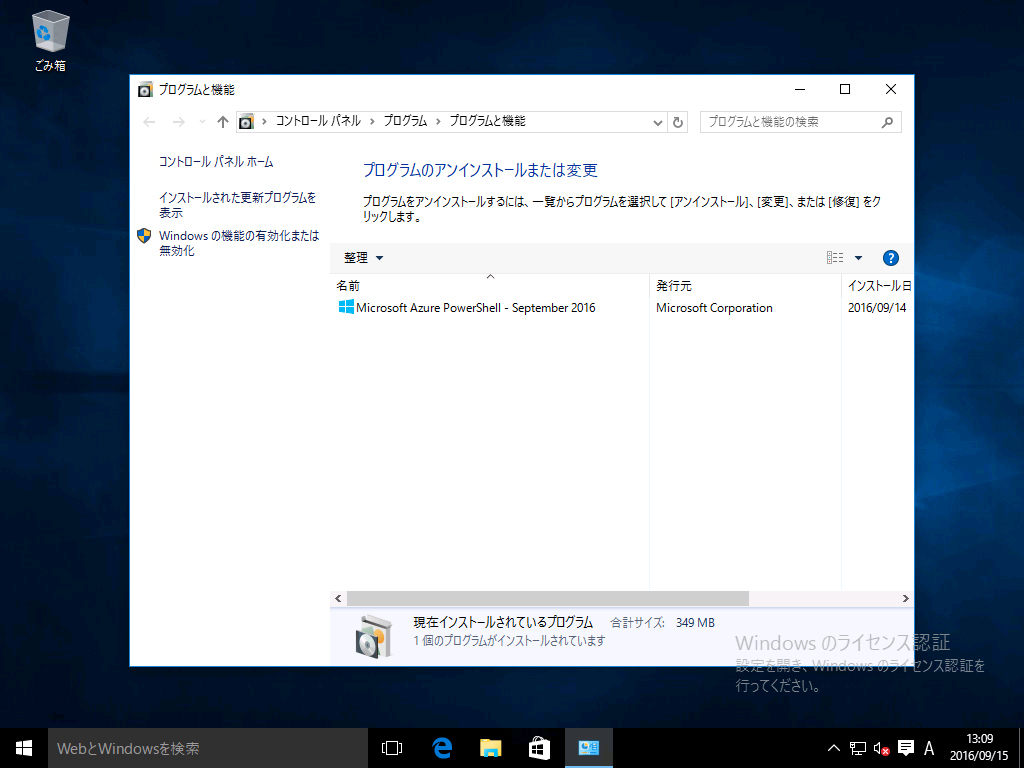
上記は空の VM を作っただけなので、続いてインストーラーを VM 内にコピーして実行します。
あわせて、せっかくなので Windows PowerShell の Execution Policy とか、Explorer のレジストリも一緒に設定しています。
$PowerShellInstallder | foreach{
    # 各種変数を設定
    $FullPath = $_.FullName
    $FileName = $_.Name
    $Ver = $_.Name -replace 'azure-powershell.', '' -replace '.msi', ''
    $VMName = 'Win 10 Ent x64 with Azure PowerShell $Ver'
    $InstallerPath = 'C:\Users\Public\Documents\$FileName'

    # 新規セッションを確立
    $Session = New-PSSession -VMName $VMName -Credential $Cred

    # VM 内で実行する処理の定義
    $DeployScript = '
    reg add HKCU\SOFTWARE\Microsoft\Windows\CurrentVersion\Explorer\Advanced /v LaunchTo /t REG_DWORD /d 1 /f
    reg add HKCU\SOFTWARE\Microsoft\Windows\CurrentVersion\Explorer /v ShowRecent /t REG_DWORD /d 0 /f
    reg add HKCU\SOFTWARE\Microsoft\Windows\CurrentVersion\Explorer /v ShowFrequent /t REG_DWORD /d 0 /f
    reg add HKCU\Software\Microsoft\Windows\CurrentVersion\Explorer\Advanced /v HideFileExt /t REG_DWORD /d 0 /f
    reg add HKCU\Software\Microsoft\Windows\CurrentVersion\Explorer\Advanced /v Hidden /t REG_DWORD /d 1 /f
    reg add HKEY_LOCAL_MACHINE\SOFTWARE\Policies\Microsoft\Windows\PowerShell /v EnableScripts /t REG_DWORD /d 1 /f
    reg add HKEY_LOCAL_MACHINE\SOFTWARE\Policies\Microsoft\Windows\PowerShell /v ExecutionPolicy /t REG_SZ /d RemoteSigned /f
    Start-Process -FilePath $InstallerPath -ArgumentList '/quiet' # Azure PowerShell のサイレント インストール
    '

    # 上記で定義した内容を、一旦ローカルに保存
    Out-File -InputObject $DeployScript -FilePath $env:TEMP\deploy.ps1

    # VM 内に Azure PowrShell のインストーラーをコピー
    Copy-Item -ToSession $Session -Path $FullPath -Destination 'C:\Users\Public\Documents'

    # VM 内でインストール処理を実行
    Invoke-Command -VMName $VMName -Credential $Cred $env:TEMP\deploy.ps1
}
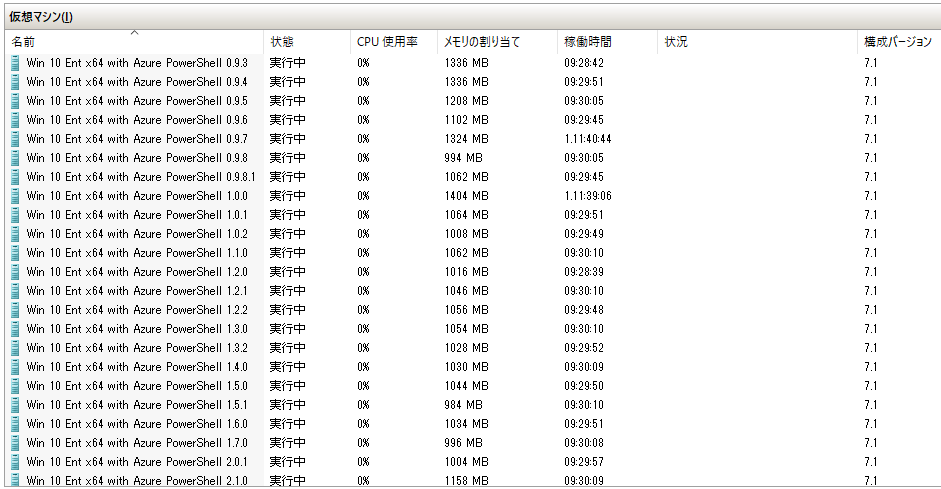
以上で各バージョンがインストールされた VM が大量に生成され、インストールも完了していることが確認できます。
VHD のコピーには結構時間がかかるので、NVMe SSD とかを使うと快適ですね。