ReplicatorGやらMakerWareを使って、Replicatorを使うのに飽きてきたGeekな皆さんが
そろそろ多数現れてくるころだと思われるので、ReplicatorシリーズをHackするための
基本的な情報をまとめておこうと思います。
ReplicatorG / MakerWareを使った出力の流れ
Replicatorを使いこんでる人には今更すぎるかと思いますが、
出力までの流れを整理すると以下のようになります。

PCからUSBで直接出力してる人だと、S3GとかX3Gはあまり馴染みが無いかもしれませんね。
※ファームウェア7.0以降では、アクセラレーション・コマンドが新しくなっているため、
S3GではなくX3Gを利用します。また、本体の設定で、ACCELERATEは有効にしておきます。
Gコード生成をHackする
通常の使い方に飽きてくると、Gコードの生成に手を加えたくなるはずです。
Gコードを生成するスライサーはReplicatorGだとSkinforge、
MakerWareだとMakerBot Slicerを大半の方が利用しているかと思いますが、
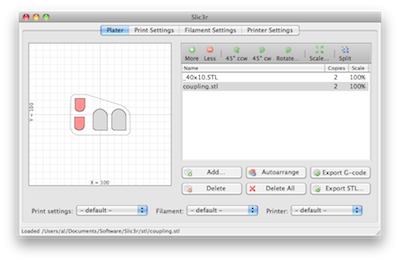
他にもKISSlicerやSlic3rなどいくつか種類があります。
(他にも色々ありそうですが私は詳しくないので知りません。)

また、既存のスライサーのプロファイルをいじるという方法もあります。
これについては「コメを噛め」様の以下の記事などが詳しいです。
Dual head replicator でのサポート出力を考える
ただ、それでも満足できない人もいるはずです。
そういう人は自分でGコードを生成しましょう。
Gコードの仕様については、以下のページなどに詳しく書かれています。
http://nc-program.s-projects.net/g-code.html#g04
http://replicat.org/gcodes
また、このページの一番下に、Replicatorが対応するGコードの一覧も載せておきます。
ゼロからGコードを生成するのは流石にハードルが高いかもしれません。
そんな場合は、ReplicatorGで生成したgcodeを切り貼りしてみる所から始めましょう。

()で囲まれた赤字の部分はコメントなので消しても何も変わりません。
設定にもよると思いますが、初めの200行程度が初期動作、
そのあとの(<layer> x.xxx )から(</layer>)のかたまりが1レイヤーに相当します。
適当に数行だけ残してBuildしてみると、何事もなかったかのように動作するはずです。
もちろんヘッドを温めていなければ樹脂は出てきませんが。
さて、ここまで来ればあとは3Dモデルを読み込んでGコードを吐いてくれるコードを書くだけです。
STLのファイルフォーマットについては以下に書かれているので参考にしてください。
http://www.hiramine.com/programming/3dmodelfileformat/stlfileformat.html
自作のGコードをReplicatorGに貼り付けて、Buildを押せばその通り動くはずです。
そのひと手間すら面倒だという方は、S3Gの仕様も公開されているようなので
以下の情報を漁ってみてください。私はそこまでするのは嫌です。
https://github.com/makerbot/s3g/tree/master/doc
ちなみに、X3Gのドキュメントは軽くしか探していませんが、見当たりませんでした。
どなかた所在を知っていたら教えてください。
(多分海外のユーザーグループで同様の話題は出てる気がします。)
というわけで、私が今分かっていることを吐き出しておきました。
あとは誰か時間とスキルのある方に期待します。
参考:Replicatorが解釈できるGコード一覧(ReplicatorG – 0040よりコピペ)
G0: Rapid Positioning
G1: Coordinated Motion
G2: Clockwise Arc
G3: Counter Clockwise Arc
G4: Dwell
G10: Create Coordinate System Offset from the Absolute one
G20: Use Inches as Units
G21: Use Milimeters as Units
G28: Home given axes to maximum
G53: Set absolute coordinate system
G54: Use coordinate system from G10 P0
G55: Use coordinate system from G10 P1
G56: Use coordinate system from G10 P2
G57: Use coordinate system from G10 P3
G58: Use coordinate system from G10 P4
G59: Use coordinate system from G10 P5
G70: Use Inches as Units
G71: Use Milimeters as Units
G90: Absolute Positioning
G91: Relative Positioning
G92: Define current position on axes
G97: Spindle speed rate
G130: Set given axes potentiometer Value
G161: Home given axes to minimum
G162: Home given axes to maximum
M0: Unconditional Halt, not supported on SD?
M1: Optional Halt, not supported on SD?
M2: End program
M3: Spindle On – Clockwise
M4: Spindle On – Counter Clockwise
M5: Spindle Off
M6: Wait for toolhead to come up to reach (or exceed) temperature
M7: Coolant A on (flood coolant)
M8: Coolant B on (mist coolant)
M9: All Coolant Off
M10: Close Clamp
M11: Open Clamp
M13: Spindle CW and Coolant A On
M14: Spindle CCW and Coolant A On
M17: Enable Motor(s)
M18: Disable Motor(s)
M21: Open Collet
M22: Close Collet
M30: Program Rewind
M40: Change Gear Ratio to 0
M41: Change Gear Ratio to 1
M42: Change Gear Ratio to 2
M43: Change Gear Ratio to 3
M44: Change Gear Ratio to 4
M45: Change Gear Ratio to 5
M46: Change Gear Ratio to 6
M50: Read Spindle Speed
M70: Display Message On Machine
M71: Display Message, Wait For User Button Press
M72: Play a Tone or Song
M73: Manual Set Build %
M101: Turn Extruder On, Forward
M102: Turn Extruder On, Reverse
M103: Turn Extruder Off
M104: Set Temperature
M105: Get Temperature
M106: Turn Automated Build Platform (or the Fan, on older models) On
M107: Turn Automated Build Platform (or the Fan, on older models) Off
M108: Set Extruder’s Max Speed (R = RPM, P = PWM)
M109: Set Build Platform Temperature
M110: Set Build Chamber Temperature
M126: Valve Open
M127: Valve Close
M128: Get Position
M131: Store Current Position to EEPROM
M132: Load Current Position from EEPROM
M140: Set Build Platform Temperature
M141: Set Chamber Temperature (Ignored)
M142: Set Chamber Holding Pressure (Ignored)
M200: Reset driver
M300: Set Servo 1 Position
M301: Set Servo 2 Position
M310: Start data capture
M311: Stop data capture
M312: Log a note to the data capture store
M320: Acceleration on for subsequent instructions
M321: Acceleration off for subsequent instructions
T0: Set Current Tool 0
T1: Set Current Tool 1